I would like to give credit to Night_fate & Sick-sad-little-mara both from deviantart community for the materials used in this tutorial:
Background image by Night_fate of deviantart
Step 1: Open the background image. This will be used also as the canvas.

Step 2: Duplicate the bg image and apply gaugasian blur (20 pxls). Add a layer mask and apply a black to white gradient to hide the bottom part. This will soften the clouds.

Step 3: Add the footprints and scale it to fit in the road and add hue/saturation and clip it to footprints layer and desaturate by 50%. This will blend the footprints layer to background.

Step 4: Add a adjustment layer Hue/Saturation and desaturate it by 50%.

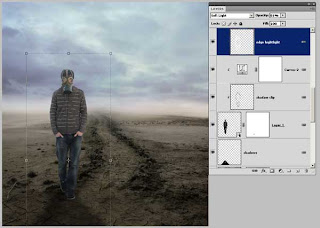
Step 5: Merge all layer on a new layer (Shift+ctrl+E). Change blending mode to Multiply and set opacity to 75%. Add a layer mask and hide the lower part, then with a soft brush (with 25% opacity) paint on the the mask the areas of the clouds that you want to bring the back the lightness.

Step 6: Add the man into the composition. Create a layer under it and change blending mode to Multiply then with a soft brush paint with black to simulate the shadows. Add another layer above man's layer and clip it then with a soft brush paint the edges of the man with black with black to hide the white trace around the man. Add also curve adjustment layer to lighten the man's layer. Then add another layer and paint with white to give highlights to the man's layer edge.
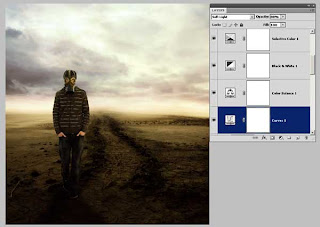
Step 7: Add the following adjustment layer to blend all the images. Don't hesitate to experiment with the settings to achieved your desired mode. Do not limit with these adjustment layers, you can add more or even utilized less as long as see the overall tone and colors are balance depending on the mode and feel you like.
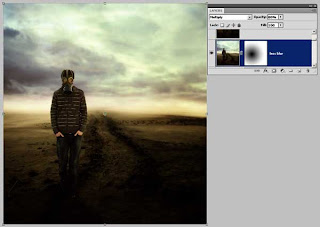
Step8: Merge all layers (Shift+ctrl+E). Apply lens blur (you can experiment with the settings, for this project i only apply what the default setting) change blend mode to multiply and add a layer mask. Then apply with Black to White radial gradient to create a soft vignette effect To give more focus on the man as the focal point of the composition.
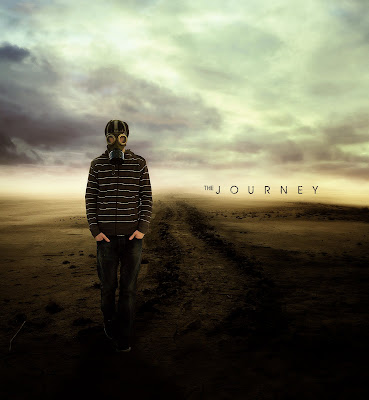
Step9: Merge all the layers again and apply filter > sharpen> sharpen to bring back some details loss. The add the title text. And that's it were done!

Here's the final image:
No comments:
Post a Comment